by Dr. Carrie Magnuson
I began my dental sleep medicine career approximately 10 years ago. The way I practice dental sleep medicine today is quite a bit different from back then. The old adage of “we learn more from our mistakes than from our successes” rings true. Here are a few tips from lessons I’ve been taught over the years:
Table of Contents
How do you know where you are if you don’t know where you began?
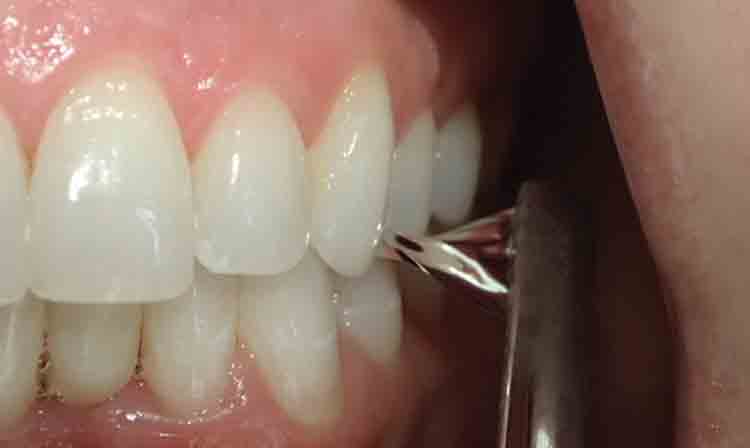
You must have good pre-treatment records. If a patient comes in with a concern, whether shortly after starting therapy or years later, the first thing I think of is, “Can I compare ‘now’ to ‘then’?” I look for their HPI notes, imaging, pre-treatment measurements, and photos. If my team and I have taken thorough pre-treatment records, then I can assess whether there has been a change. Sometimes a patient says their bite has changed or feels they are no longer biting on a tooth where they were previously occluding. If I can show them where they started, I can address their concern. This goes for interproximal and occlusal contacts, mobility, mandibular posturing, gum levels and even tori. I have used my pre-operative photos to show the patient they had a diastema between 8 and 9 before treatment, so the one they just noticed is not because they are wearing a MAD. One of the well-known potential side effects of OAT is change to the occlusion. I find it very valuable to use shimstock (Almore International, Portland, OR) to check pretreatment positive contacts.
Don’t just cross your fingers that you have what you need. Take the time at the beginning to have accurate records. Take photos of the teeth in full occlusion and anything that is unusual, such as crowded lower incisors, soft tissue anomalies, canted occlusal planes, and tongue indentations. We send pictures of any midline discrepancies, along with photos of the bite registration, to the lab to verify the 3D bite during appliance fabrication. That way, they also know ‘where we begin.’
Assess!
At your follow-up exams, when you are taking new measurements, are you reviewing the previous information and “assessing” whether there are changes? Or simply documenting the current information? During my annual exams, I display the patient’s previous bite measurements on a screen. While I am taking new measurements I “Assess” whether there are any changes. This is not any different than what the hygienists do when probing. If there are noted changes, I discuss them with the patient to see if it is a problem they want to address. If it is an opening of an interproximal contact, I will talk about possible next steps such as adjusting the inside of the MAD or whether they would like to try Essix retainers. Often times the patient is not even aware of any changes. The same is true for changes in their bite.

AM Aligners/Morning Repositioners: “Mirror, Mirror on the Wall”
I have had many patients over the years complain of bite changes. One of the first questions I ask is, “Are you using your morning aligner?”. ‘Yes,” they say. I try the AM aligner in and the grooves of the teeth don’t fit. “Please tell me how you use it.” They state they put the AM aligner in and squeeze on it and follow the instructions. What I find is they are not checking to see if they are fully seating their teeth into the grooves. I now have models in every exam room with an example of an AM aligner. I show them with the models how 0.5mm away from fully seated “is not good enough”. I instruct them to confirm in the mirror that their maxillary incisal edges are fully seating into the grooves. They need to use the AM Aligner until their teeth fit into the grooves without effort. Then, confirm in the mirror. Of course, that also means your AM Aligner, which we make using Thermacryl (Airway Technologies, Carrollton, TX), must allow them to see where their edges fit. Don’t bury the incisal edges of the maxillary incisors in the material, and make sure the shimstock holds firmly on the previously noted occlusal contacts with the AM aligner in place. We picked up this tip from Dr. Jamison Spencer!


TAB Therapy
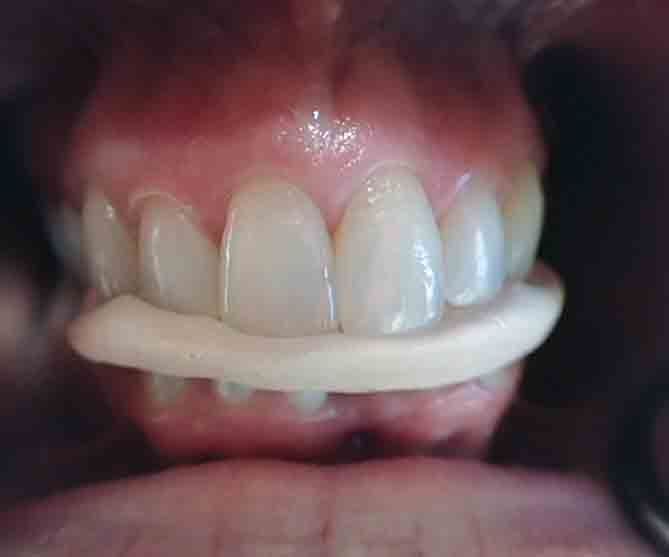
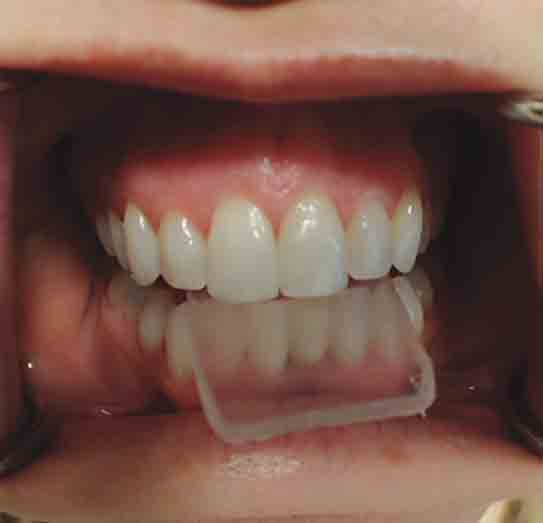
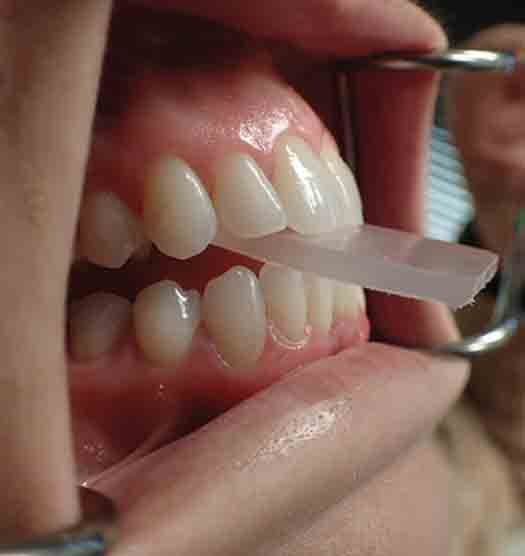
I saved one of my favorites for last…I love TAB therapy and so do my patients! We simply cut rectangles out of 3mm bite-guard material to make these TABs. I use TAB therapy when a patient’s mandible is postured forward. If a patient is noting bite changes or I have noted bite changes based on my exam, I will immediately start them with TAB therapy while they are sitting in the chair (after checking for anterior tooth mobility first). I created a short video demonstrating instructions. The majority of the time, the patient will feel “stretching” of the masseters and around their TMJs – the lateral pterygoid location. I have them continue for approximately 5 minutes and ask about their bite. I love seeing their eyes light up like I am a miracle worker! “Wow, my bite feels so much better now!” Sometimes I will need to send them home with the TAB and have them return once their bite feels better. I have found this is also a helpful tool if the patient is noting muscle discomfort. I tell them to think of it as a getting a “professional stretch at the gym”.
I follow the appropriate follow up exams as recommended by the AADSM at 1 week, 3 months, 6 months, and annual intervals. Often times I will note something even though the patient is completely unaware. It is better if we can help our patients proactively and not reactively.
We try to do the best for our patients – that is what makes us sleep well at night. Being in health care, with variable human responses, we can’t be sure where the therapy will take anyone. But, with excellent records, we can always know where they began.
Efficient patient screening is imperative to finding the right alternatives for patients. To read more tips for Dental Sleep Medicine, check out Dr. Shouresh Charkhandeh’s article, “Precision medicine in a Dental Sleep Practice.”

